Create a low-maintenance moonlighting garden bed
In the 1880s if you committed crimes at night you were working by the "light of the moon." Eventually, if you held a second job, especially at night, you were moonlighting. With a little effort, now you can get your flower garden to take on a second job, do double duty and “moonlight."
Next spring’s daffodils are among the easiest and longest-lasting flowers you can plant.
Unfortunately, after daffodils bloom, the flowerheads and leaves turn brown. Even if you can chop off the dead flower heads, you need to leave all of the daffodil’s foliage to store energy for blooms the following spring. The American Daffodil Society recommends naturalizing daffodils that last well, such as Ice Follies, Tete-a-Tete, Flower Record, Delibes, Unsurpassable, Barrett Browning, Scarlet Gem, Geranium, Cheerfulness, Peeping Tom, Mount Hood, Spellbinder, Carlton, and Viking. For all-season bloom mix up these daffodils or plant a premixed blend.
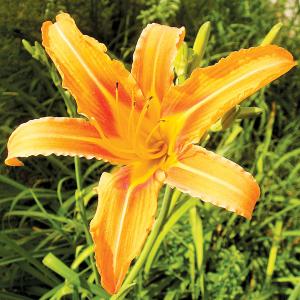
You can moonlight a second job for the daffodil bed by planting summer-blooming daylilies. This way the daylily begins sending up fresh green shoots right after the daffodils are finished blooming. The same low-maintenance daffodil bed becomes a low-maintenance daylily bed. Both plants thrive on gentle neglect.
As early as possible in the spring, lightly rake the bed to remove old leaves and mulch.
While both daffodils (Narcissus) and daylilies (Hemerocallis) tolerate poor soil, you can help them along with a springtime boost of good compost or an organic bulb fertilizer.
Both favor neutral spoil pH between 6.1 and 7.8. Best of all, daylilies and daffodils can both tolerate light shade and are usually disease-free.
Choose a well-drained permanent bed for your moonlighting garden. If you have heavy soil, dig in compost, aged manure, or peat moss. Place the daylily roots on top of the soil, spacing them 18 to 24 inches apart in staggered rows. Once all the daylilies are laid out, plant them in holes deep enough so that the top of each daylily crown is one inch below the soil level. The crown is the point where the stems attach to the roots.
Spread the roots out like the spokes of a wheel and cover with dirt. Tamp the soil down firmly so there are no air pockets.
Once the daylilies are planted, spread the daffodil bulbs on top of the soil evenly among the newly planted daylilies. Leave about 6 inches between the daffodil bulbs and the daylilies.
Plant the daffodils six to seven inches deep. Again, tamp down the dirt to fill any air pockets and water well.
Sometimes alternate thawing and freezing of the soil in winter can push or heave newly planted daylily crowns out of the ground. To protect against this heaving during their first winter, after the ground freezes, cover the bed with about four to six inches of loose organic matter such as straw, oak leaves, or even two-foot-long evergreen branches. Gently remove this winter cover in early spring.
Next spring, your bed will bloom for four to six weeks of mixed daffodils followed by a summer full of daylilies. After hard frost in fall, cut the daylilies down to the ground.
Plant daylilies topped with daffodils this fall and enjoy a carefree garden for years to come. Getting a flowerbed to do two jobs by moonlighting never seemed so easy.


